Gridfinity Bins: How to Design Your Own and Get Them Printed
6 min read
Gridfinity is an open storage standard. Everything sits on a 42mm by 42mm grid, with heights in 7mm steps. Bins drop into baseplates, baseplates line a drawer, and any bin fits any plate.
It was released free by Zack Freedman with no company behind it, which is why the tooling around it is so good. Dozens of people have built generators for it.
The reason it's worth the effort: you can organize a drawer exactly, then change your mind next month and move three bins without reprinting a thing.
Answer three questions first
- What are you organizing, a drawer, a shelf, or a toolbox?
- Do you want standard bins, or bins cut to fit specific tools?
- How much area are you covering?
Measure the drawer before you open any software
Internal width and depth, not the outside of the unit. Divide each by 42 and round down. A 400mm wide drawer takes 9 units across and leaves 22mm spare. That leftover strip is normal and nobody notices it once the drawer is full.
Measure the internal height too. Bin heights go up in 7mm steps, so a 60mm deep drawer takes bins of 6 units or shorter once you allow for the baseplate underneath.
If you'd rather work in inches, the generator has a "show inches" toggle next to the measurements readout.
The generator we recommend
gridfinitygenerator.com. Free, runs in the browser, exports STL. It has four modes: baseplate, box, cutout, and collection.
Start with the baseplate
This is the simplest thing in the tool. Set X units and Y units, and you're done. Turn on "Show Build Plate" and set the size to 325 by 320, which is our largest bed. The plate then draws underneath your grid so you can see at a glance whether it prints in one piece.
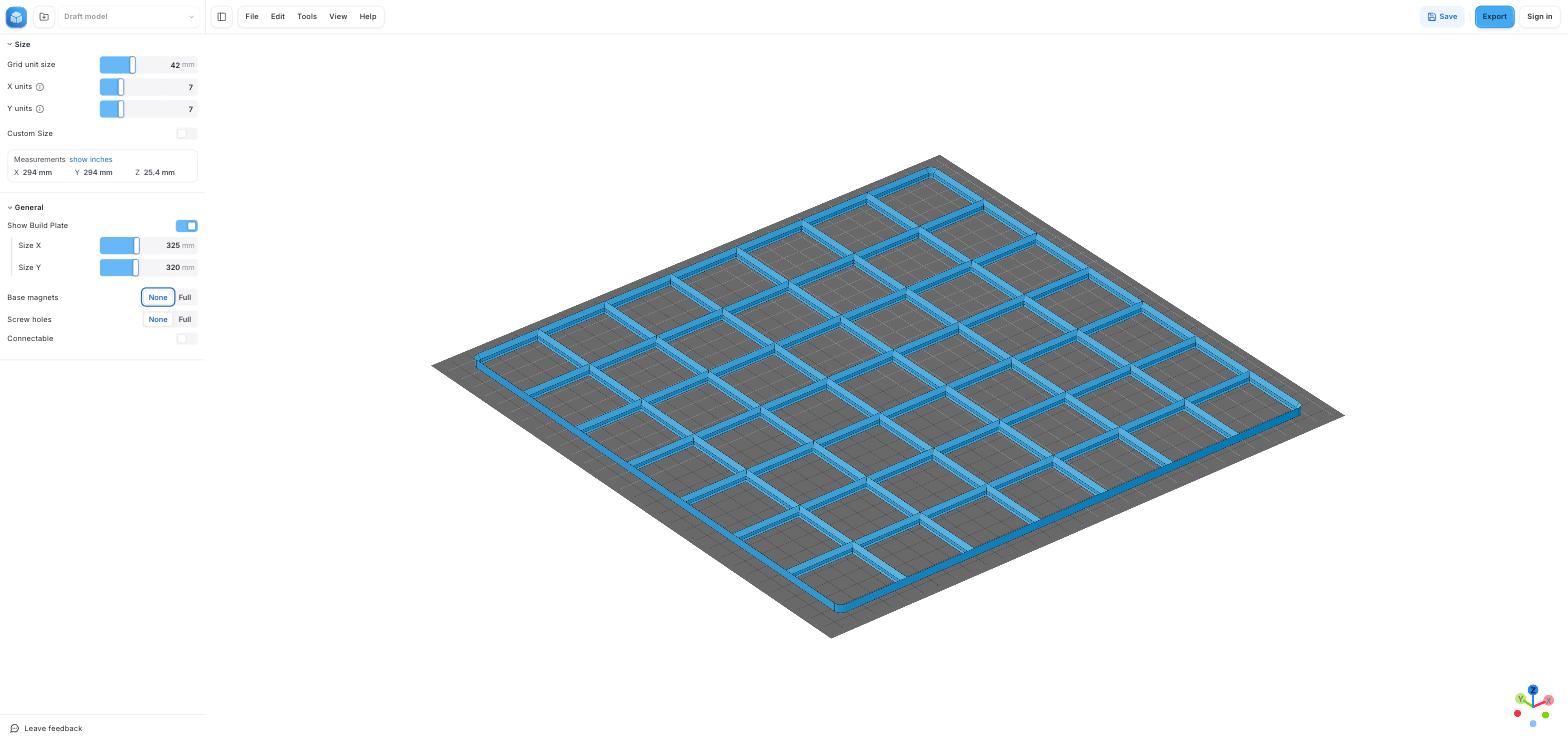
There's a "Connectable" toggle that adds interlocking edges. Use it on anything bigger than one plate, because the tiles then lock to each other instead of sliding around.
Then the bins
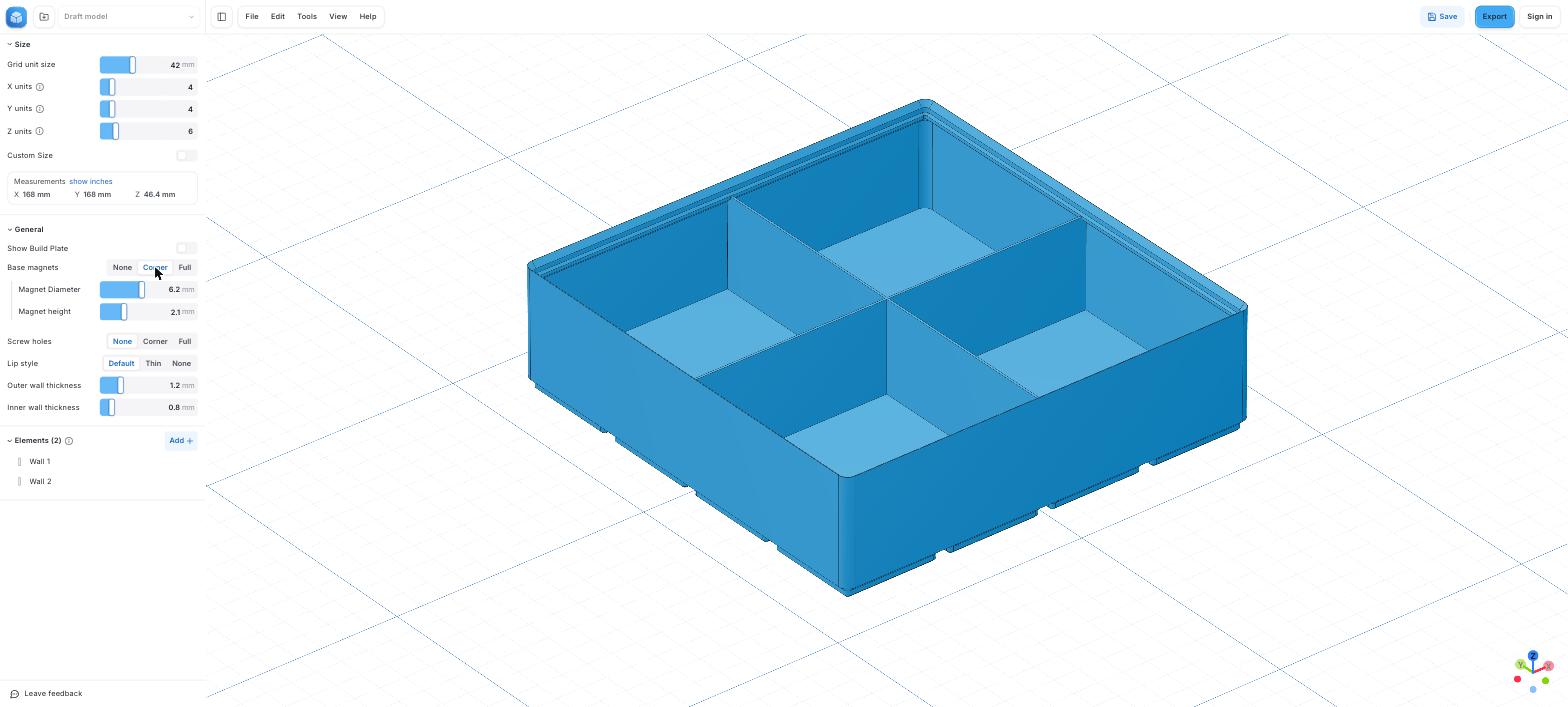
The box mode has X, Y and Z sliders. Note that the Z figure you see includes the stacking lip, so 6 Z units reads as 46.4mm rather than 42mm.
Internal dividers live under Elements. Add a wall, then set its position and length. Positions move in twelfths of a grid unit, which is 3.5mm a step, so you can put a divider almost anywhere rather than only on the grid lines. There are also Ledge and Scoop elements, the scoop being the angled floor that rolls small parts to the front.
Magnets and screw holes
Both are built into the generator. Base magnets and screw holes each offer None, Corner or Full. The default magnet pocket is 6.2mm across and 2.1mm deep, which takes a standard 6x2 magnet with a little clearance.
Magnets are worth it in a drawer that gets yanked open hard, and unnecessary in one that doesn't. Corner mode puts four in every bin, so a thirty bin drawer is a hundred and twenty magnets and a real stretch of bench time to seat them all. That makes fitting them a priced extra rather than something we fold in.
Ask for magnets when you send the quote request and we'll come back with a price that covers the magnets and the labor, so you can decide with the number in front of you.
If you'd rather not pay for the fitting, we'll print the pockets and leave them empty. Magnets are cheap in bulk and seating them is an evening in front of the television.
The cutout tool has one trap in it
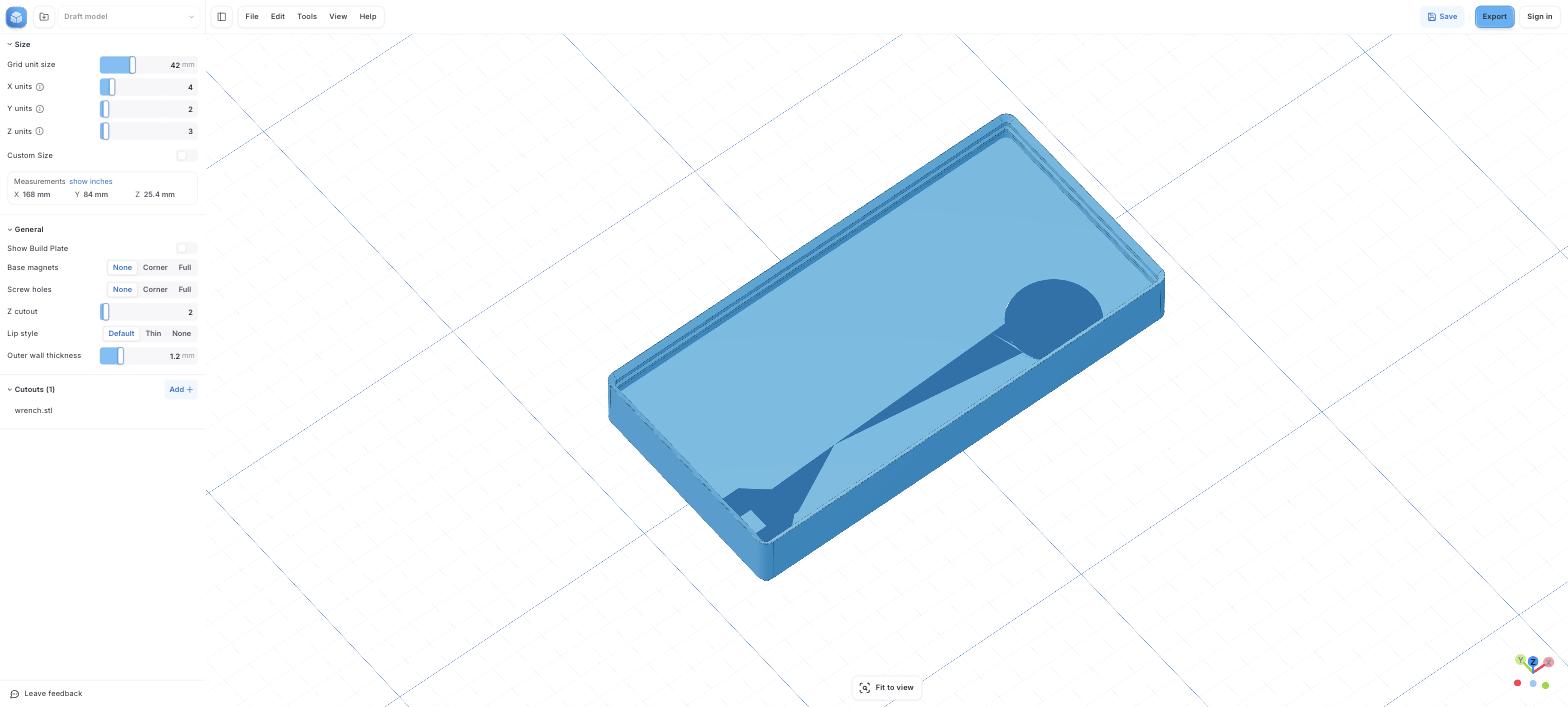
Cutout is the most useful mode. Import an STL of a tool, position it, and the tool carves that shape into a solid block.
The trap is that the cavity comes out exactly the size of the model you imported. No clearance at all, which means the real object will not fit in the hole. The generator says so itself in the side panel.
You can scale the model up to compensate. How much depends on the shape. A few percent works on a compact object and goes wrong on anything long and thin, because scaling a 200mm wrench by 2% adds 4mm of length you never wanted.
Send us the file and tell us what it's holding. Getting the clearance right is our problem.
Other tools worth knowing
gridfinity.xyz is the unofficial wiki and the best place to start if you want to understand the spec itself.
Perplexing Labs' generator is form driven rather than visual. Good for bins, lids and rugged boxes when you already know your numbers.
Gridfinity Layout Tool plans a whole drawer visually, handles stacked layers, and produces a print list at the end.
tooltrace.ai works from a photo. Lay your tools on a sheet of letter paper, photograph them, and it traces holders around the outlines.
Extrabold.tools is a fast baseplate generator with live previews.
Bed size sets the tile size
Our largest bed is 325 by 320mm, which takes a 7 by 7 baseplate in one piece. That's 294mm square, with real margin at every edge rather than a part squeezed against the limit.
Eight units would be 336mm and doesn't fit, so 7 by 7 is the ceiling for a single tile. Bigger drawers get split across several plates. Most people do it that way regardless, because a tiled floor lifts out and rearranges more easily than one solid slab. Turn on Connectable and the tiles lock to each other.
Color coding
Bins print fine in a single color. If you want to code by category, or want label tabs in a contrasting color, we can print that in one pass. We run up to 13 colors.
Why send a whole drawer at once
A fully kitted drawer is usually 20 to 40 parts and well over 30 hours of printing. Setup dominates the cost on small parts, so a batch of 30 bins costs far less than 30 times the price of one bin. Send the lot together rather than trickling them in.
What to tell us
Send the STL files, or skip the software entirely and send us the drawer measurements plus a list of what's going in it. Tell us the colors and whether you want label tabs. If you want magnets fitted, say so and we'll quote the parts and labor on top. If you're using cutouts, say what each one holds so we can set the clearance before we print.